Use your mouse to navigate; scrollwheel to zoom in and out.
When taking panoramic pictures, a way of rotating the camera about the point of zero-parallax is required for seamless
stitching. This point called the nodal point (but there is also some confusion with it being also called the
entrance pupil ... etc..), and often lies somewhere within the lens. The actual position varies for different lenses and camera setups. For panoramas which include a lot of foreground, taking photographs about the nodal point is even more critical to reduce parallax errors which can result in images which are difficult to stich together. In order to
achieve this, a panoramic tripod is required, which allows for accurate placement of the camera about its nodal point and also to allow smooth motion and
reproducible tilts.
There are many commercially available panoramic tripod attachments which screw onto your existing tripod. However, most of them are prohibitively expensive. Having discovered a workshop
available for use in my school, and inspired by several amateur home-built pano heads, I decided to get to work and build one myself. This page documents the design process, construction, calibration and importantly, results.
Design
I browsed a few of the more popular online panoramic tripod heads
available to get an idea of how I would be able to make my own tripod head.
KingPANO (www.kingpano.com)
Manfrotto (www.manfrotto.com)
MK Panorama Systeme (www.vr-head.com)
Nodal Ninja (nodalninja.com)
panofix.com (www.panofix.com)
panorama-hardware.com (www.panorama-hardware.com)
Panosaurus (gregwired.com/pano/Pano.htm)
Really Right Stuff (reallyrightstuff.com)
With the commercial designs in mind, I set for the following design goals for the construction.
Sturdy
Reasonably well made (limited to scrap material at the workshop)
Reasonably precise
Easy and quick to construct
Adjustable to fit different cameras and lenses
Material Choice - Aluminium
It was my first time working at this workshop. The
available tools include a commercial sized milling machine, a lathe, and various saws and hand tools along with a pile of junk aluminium sheets, bars, and other materials.
While the design was guided by the requirements I set
out above, the actual construction was limited by the raw materials at
hand. Aluminium was chosen as the primary material due to it's ease of
machinability, durability and availability. After a quick browse at the
available materials, a sketch was drawn up and construction began. This took a few hours of one afternoon at the workshop.
Construction
I browsed a few of the more popular online panoramic tripod heads
available to get an idea of how I would be able to make my own tripod head.
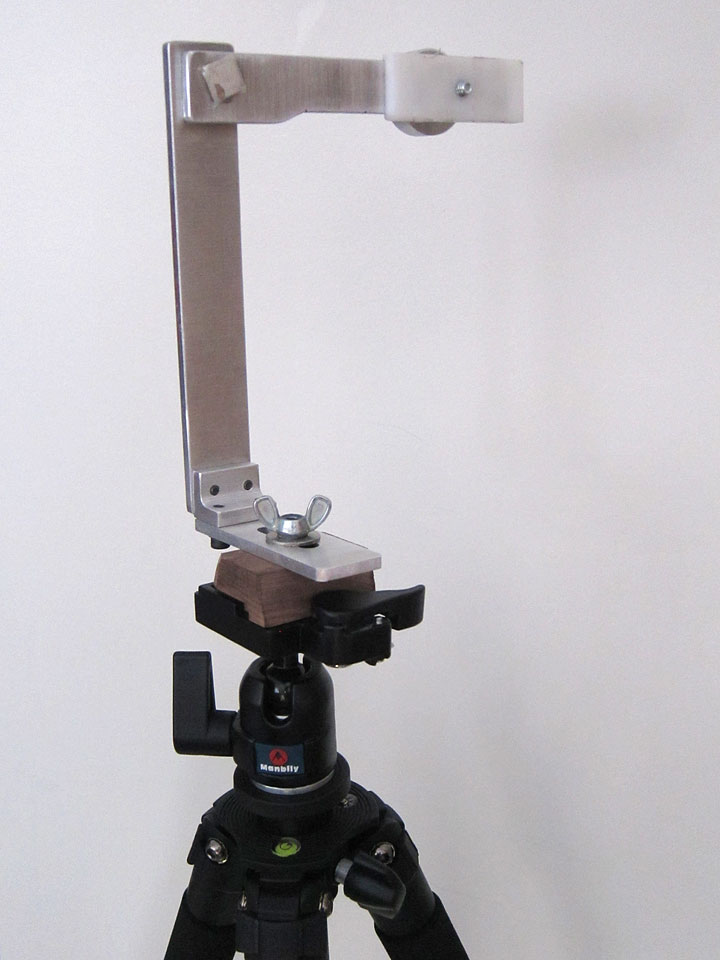
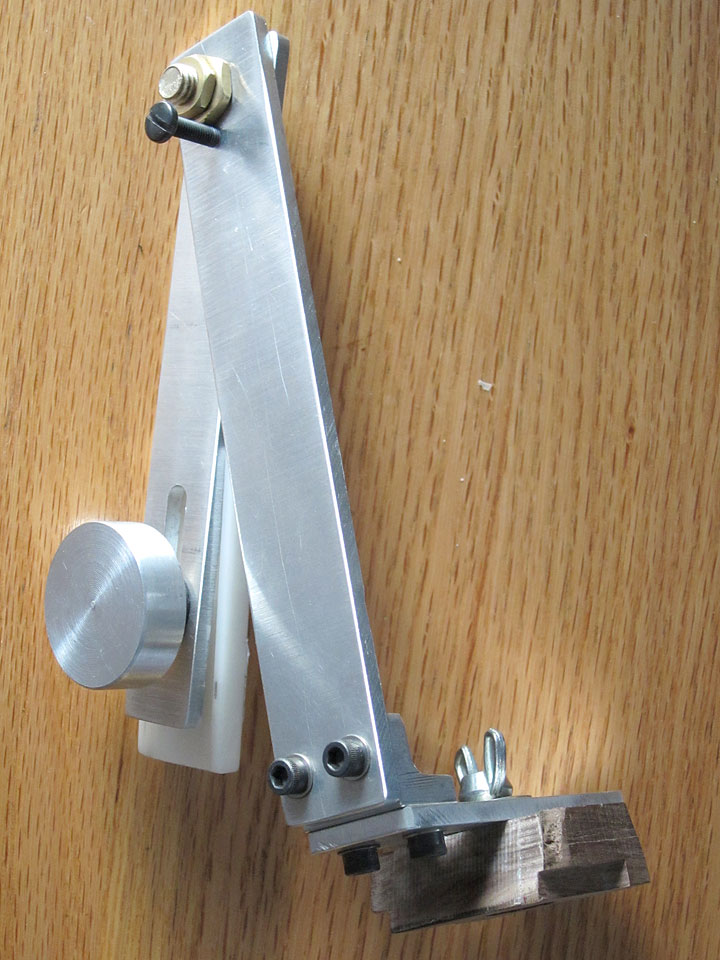
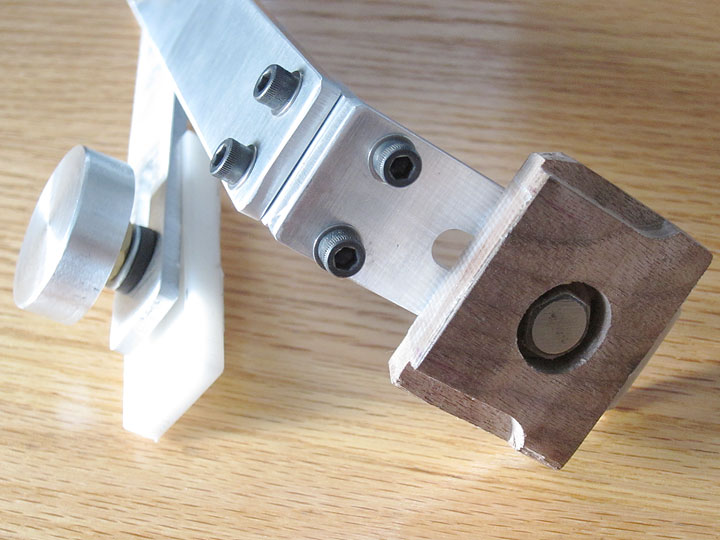
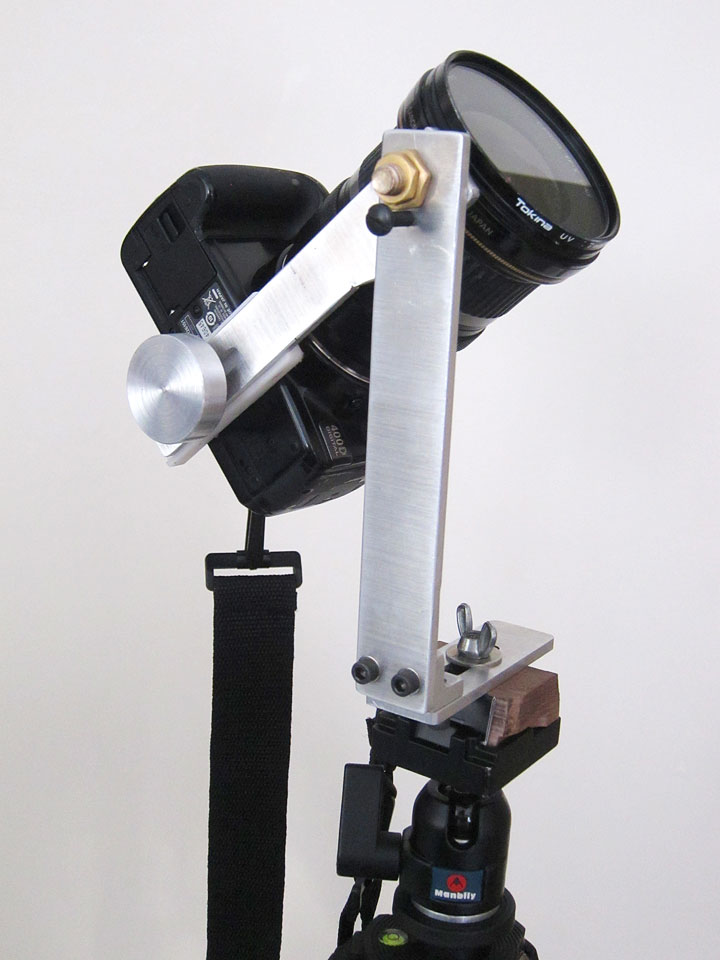
The main body of the tripod head was constructed out of 3 bars of
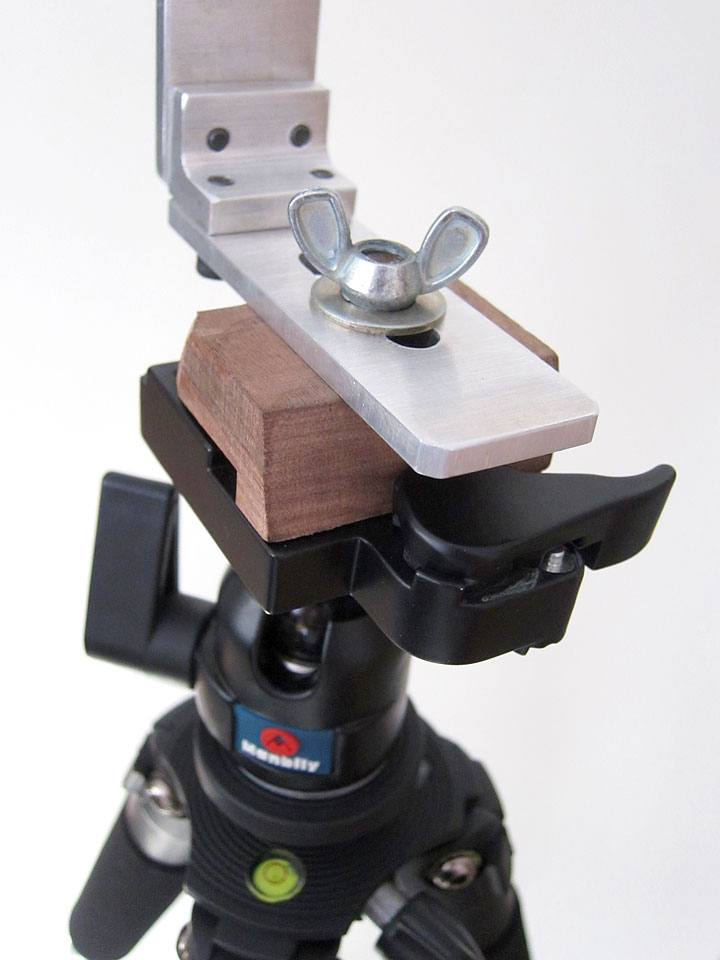
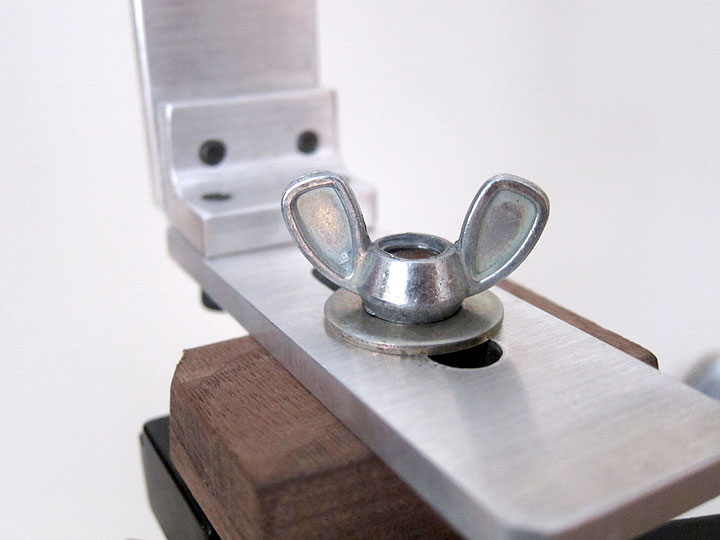
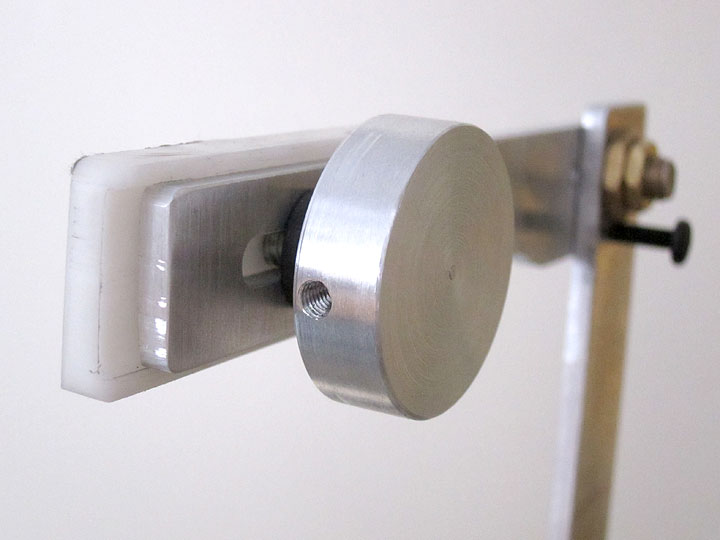
aluminium which I cut out from a piece of junk sheet. To connect them, a 90 degree bar was cut, holes were tapped into it, and then two pieces of aluminium were screwed on. Slots for the bottom wooden collar were milled, with a bolt going through the slot and held down via a wing nut. The top arm is connected via a large screw. Secondary holes were milled into the arm and a screw is used to adjust the tilt of the arm. Finally, the forward-backward adjust slot was milled in and a custom made knob was spun out of a large aluminium rod and a secured to a bolt via a set screw. A HDPE plastic sheet was milled to fit on the arm perfectly and allows a bit more purchase for the base of the camera to connect to the tripod arm.
Calibration
Calibration of the panoramic tripod head is straightforward. There are only two slider bars to adjust: The bottom left-right adjust and the top foward-back adjust. The bottom slider is adjusted so that the centre of the lens lies directly in line with the centre of rotation of the tripod. This can be aligned just by looking or using a plumbline. The forward-backward slider must be adjusted so that the nodal point of the lens lies directly above the centre of rotation of the tripod.
This webpage http://dgrin.smugmug.com/gallery/2114189 has a good explanation of the steps required to adjust the forward and back slider. The same principle applies to all panoramic heads including this one. The tripod was calibrated and little marks were engraved into the aluminium using a razor blade.
Results
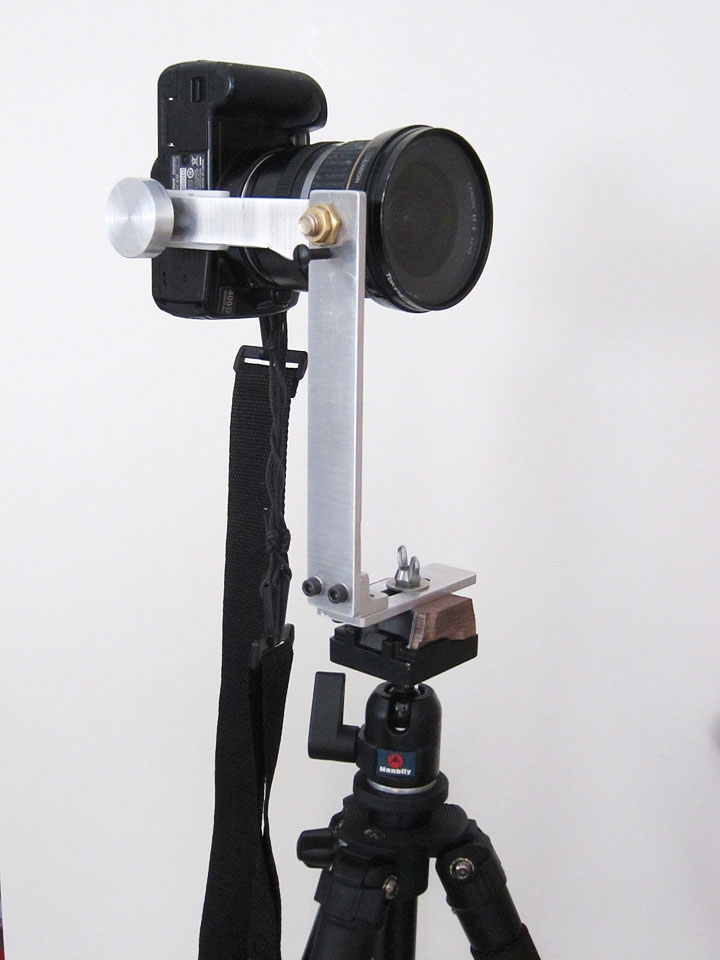
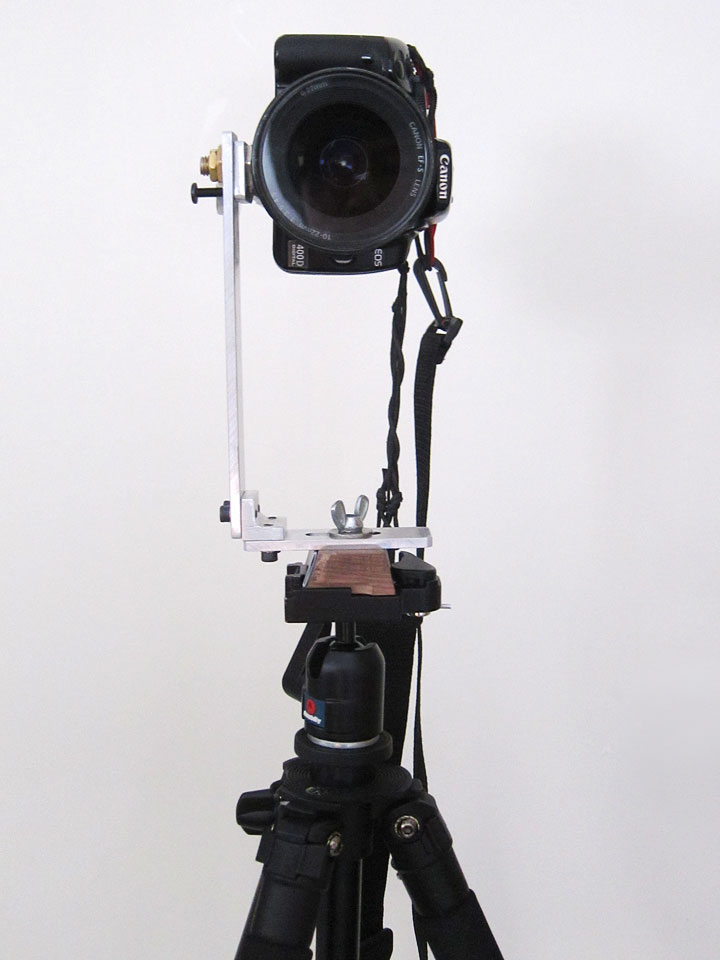
The following photos show a Canon 400D with a 10-22mm wide lens fitted onto the panoramic tripod mounted in various positions.
The only wide-angle lens I have is the Canon 10-22mm which is equivalent to a 16-35mm lens on a full-frame 35mm camera. I should
theoretically be able to get full 360 degree coverage with 6 photographs 60 degrees apart, but 8 is usually better in practice. With 6 shots at a 30 degree angle up, 6 shots at 30 degree angle down, and one shot for the zenith and one of the nadir, a complete spherical panorama can be created (total of 14 photographs).
How does this work in practice? Let your own eyes be the judge! Here is a spherical panorama of the MITERS workshop where I constructed this panoramic head. Browse below or (better) view in fullscreen!
Miters Workshop
Use your mouse to navigate; scrollwheel to zoom in and out.
As a final note - the tripod will be visible in the nadir. In order to remove it, a photograph was taken without the tripod. This was then edited into the photograph using a distortion filter in photoshop. Links to download the filters can be found in the links section below.
MIT Technique Studio
Technique's photographic studio. Technique is the student organization which complies and publishes the MIT Yearbook.
Use your mouse to navigate; scrollwheel to zoom in and out.
Good Links
Here are some nice and very useful webpages which provided inspiration and reference for the construction of my own panoramic tripod head.
Back to main page
(c) Gao Guangyan 2011
Contact: loneoceans [at] gmail [dot] com
Loneoceans Laboratories.
Copyright (c) 2003 - 2011 Gao Guangyan, All Rights Reserved. Design 3.
Removal of any material from this site without permission is strictly
prohibited and will result in infringement of copyright laws.
Disclaimer: Projects and experiments listed here are dangerous and should
not be attempted.
www.loneoceans.com/labs/
... page generated in 6.0E-5 seconds