Black Diamond Cosmo Headlamp Modification
Introduction
August 2019
Six years ago in 2013, my friend Timothy and myself decided to climb Mt.
Rainier in Washington. One item that we would need for this climb was a headlamp. I
can't quite recall the exact details, but after a bit of shopping, I
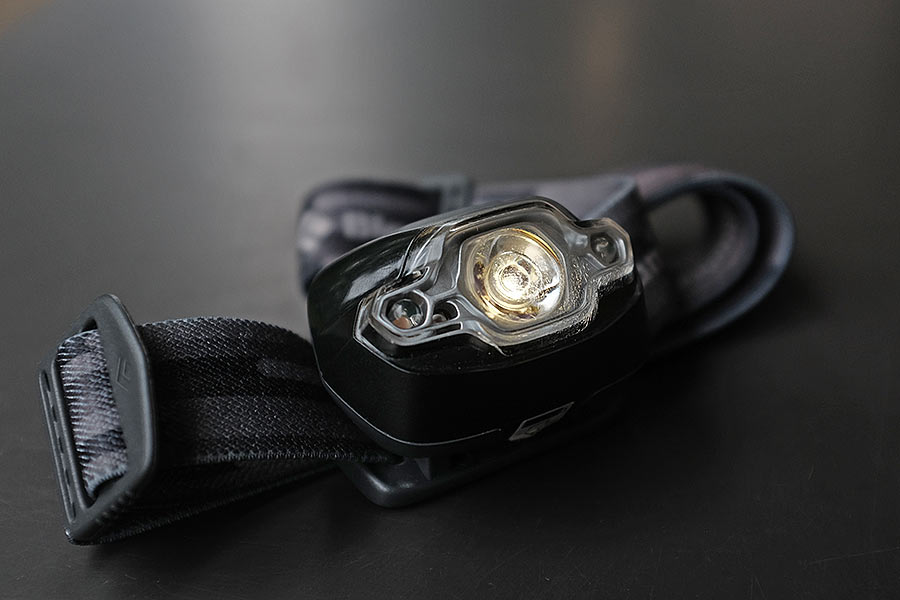
settled on the Black Diamond Cosmo headlamp (2013 version).
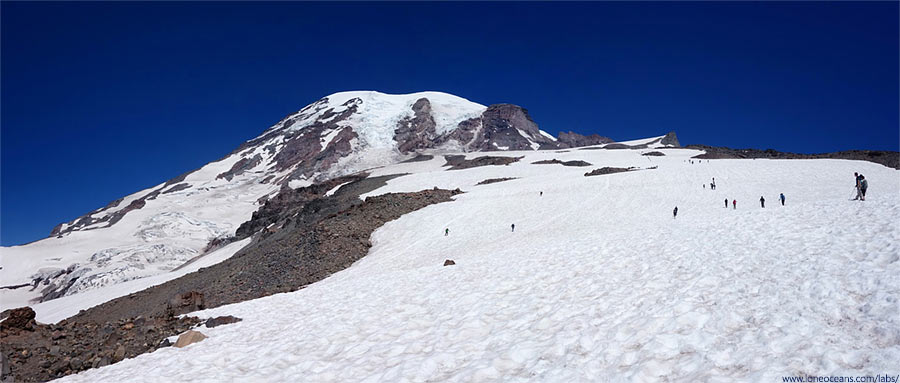
A photo taken during the two-day adventure back in 2013 on Mt.
Rainier
The main reason why I purchased the headlamp was due to its low cost
($22 USD at that time), and the fact that it had a small red LED for
night-time work without affecting night vision.
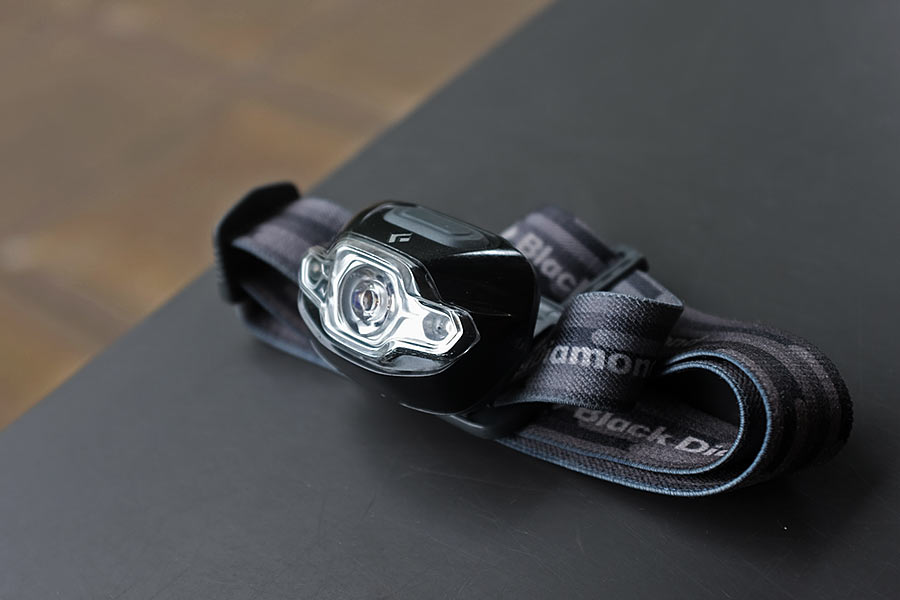
Many years on and many camping trips later, my 2013 BD Cosmo
headlamp is still
going strong! Since then, there has been a lot of new developments in
the LED world. The Cosmo line of headlamps still exists, but its design
has evolved. Having recently worked on some LED flashlight projects, I
thought I'd take apart my 2013 Cosmo headlamp and give it a
little upgrade.
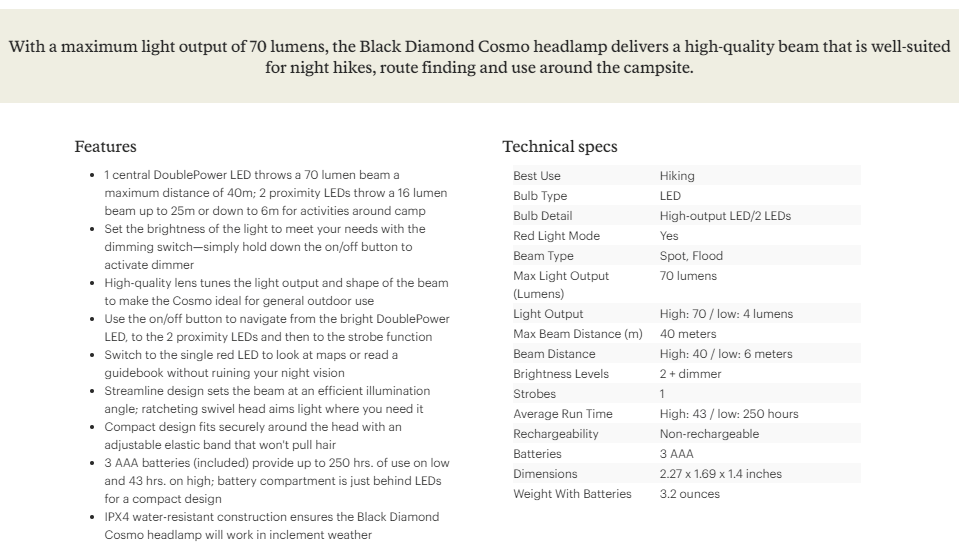
Specifications of the BD 2013 Cosmo headlamp, retrieved from
REI's website.
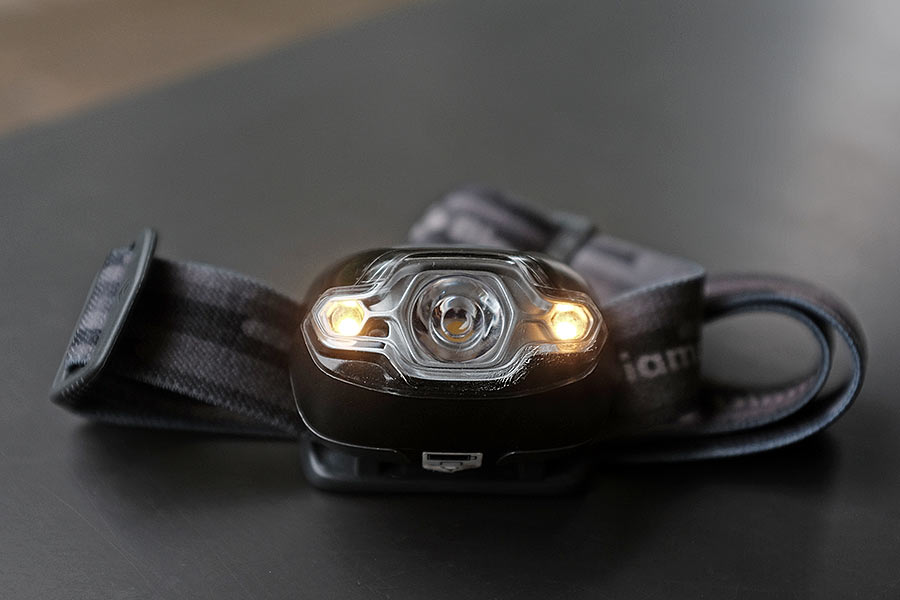
The BD Cosmo headlamp is powered by 3 AAA
batteries, and features a combination LED system that uses one bright single LED
as the main emitter, two
smaller peripheral white LEDs for auxiliary use, and one red LED. The
most recent
(2018) Cosmo headlamp improves on the original design, but keeps the same 3-LED
system, uses the same 3-AAA batteries, and features an increased lumen output
from 70 to 200 lumens with a new battery life from 30 to 180 hours.
The 2013 BD Cosmo headlamp was and still remains functional, but I wanted to see
how I could improve on its performance by taking advantage of the
advances in LED technology over the past 6-7 years. The plan is to do a
simple LED emitter swap, and leave the main drive electronics alone.
Let's begin by taking apart the headlamp!
October
2019
Design
Disassembly
The first step was to disassemble the
headlamp.
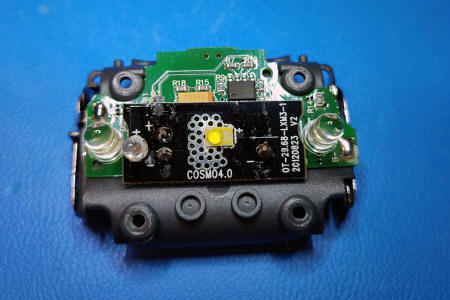

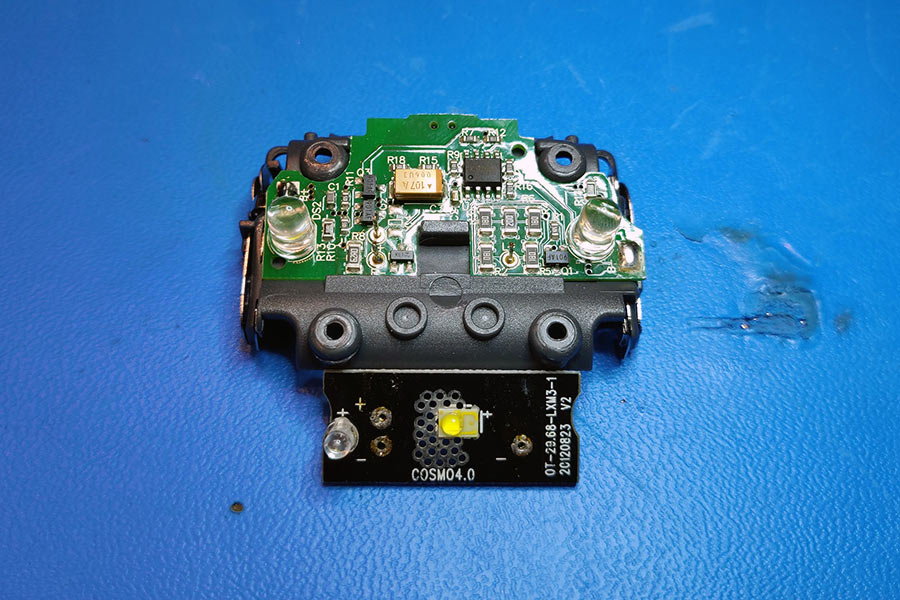
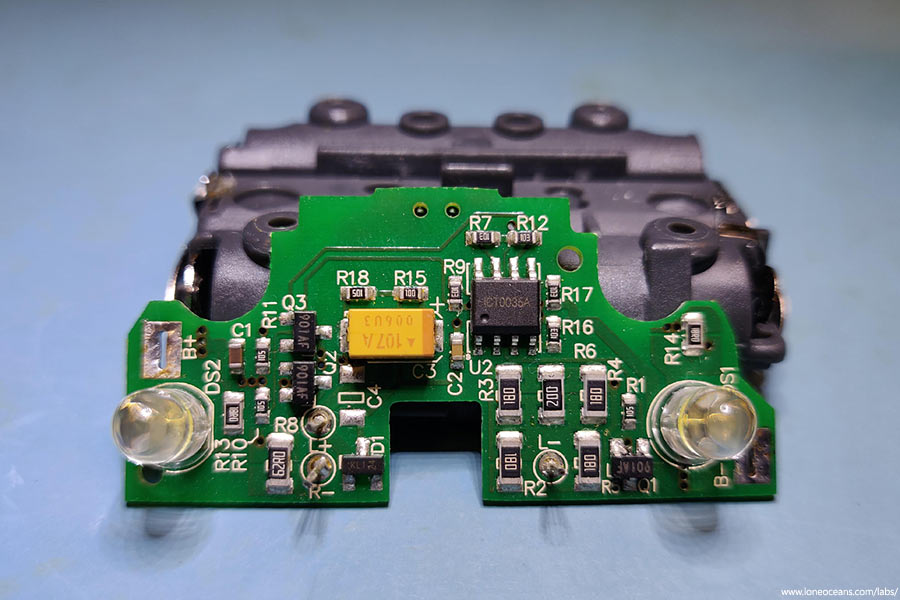
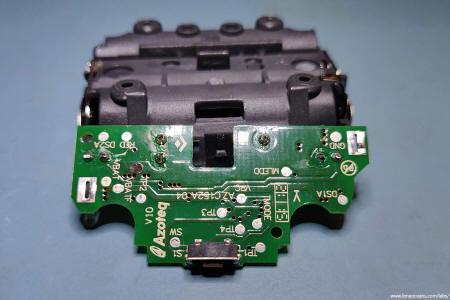
Inside, we see a very simple design with
a green PCB housing the main drive electronics, as well as the two
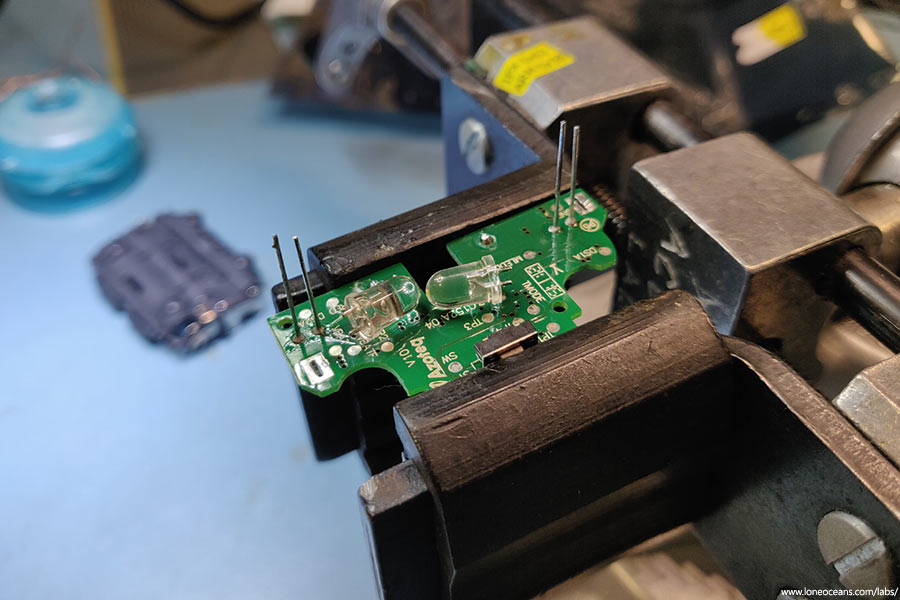
auxiliary white LEDs (in T1, 5mm dome packages). A black PCB is
connected to the main board by three through-hole pins, and houses the
main LED, as well as a single 5mm dome Red LED.
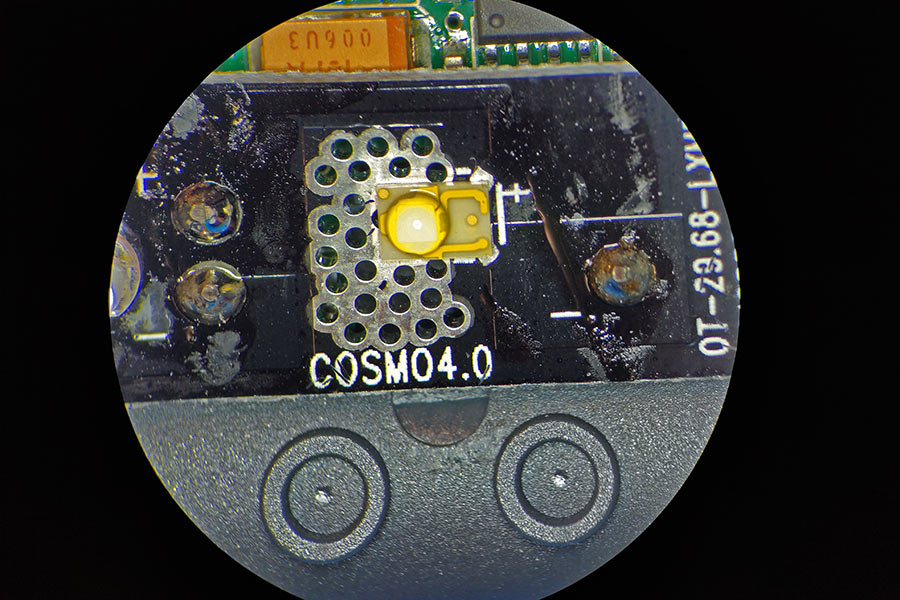
Above we can see the LED, which appears to
be one of the original Lumileds LUXEON Rebel LEDs. Large copper polygons
on the front and back, as well as a generous number of vias, act as a
heatsink for the LED.
LED Upgrade Choice
There were several issues which I wanted to improve upon
the existing design. Let's go through each set of emitters.
The main LED appeared to be a Lumileds LUXEON Rebel
emitter. It had a Cool White colour temperature (around 6000K). It was fairly bright, but didn't
have a great colour rendition. Based on
datasheets, luminous efficacy was probably something like 100lm/W, with a CRI
likely around 70 or lower. I wanted to replace it with a warmer colour
temperature light, with better CRI, and a higher luminous efficacy. I
eventually settled on the Samsung LH315B LED
(specifically, the
SPHWH2L3D30ED4TPM3). This modern LED was fairly
inexpensive ($0.99/pc at time of writing), came in a modern 3.45mm
square package, is rated at 158lm/W with a 80CRI and 4000K colour
temperature. This would give about a 50% increase in light output, and
with improved colour rendition. I also chose this LED for its
compatibility with the existing optics.
For the auxiliary white LEDs, I found the original ones
to be quite
unpleasant to use, being two very cold-white 5mm LEDs with an extremely narrow
viewing angle (something like 5 - 10 degrees). Given that the purpose of
these auxiliary LEDs was probably for close-up work (such as when you're
inside a tent in the middle of the night and don't need such a bright
light), I decided to choose a warm-white LED, with as wide a viewing
angle as possible. I settled on the Everlight
334-15/X1C5-1QSA, which came in a standard T1 5mm-dome package, had
a 50-degree viewing angle, and had a warm-white colour temperature
(exact temperature not specified since these are 'indicator-class' LEDs,
not illumination LEDs).

LED Comparison; Left to Right, Samsung LH351B, Lumileds LUXEON Rebel,
Cree XLAMP XP-E Red.
Finally, I also found the red LED to be
fairly unpleasant to use as well. Similar to the white auxiliary LEDs,
it had an extremely narrow field of view, with the optics being very poor
and exhibiting all sorts of artifacts. I decided to go for a very nice LED and
chose the Cree XLAMP XP-E photo-red LED at 660nm, specifically part
number
XPEBPR-L1-0000-00D01. This LED is capable of over 1W of output
power, although we'll be running it at much lower power. I specifically chose
a high wavelength 660nm 'Photo Red' for maximum performance during
low-light situations (e.g. Astronomy sessions). This LED being
completely different from the original 5mm dome LED would not fit as
well, but I hoped it would be able to project a much wider viewing
angle, which would be more useful for close-up use.
PCB Design
With the choice of the new LEDs decided, I had to design
a new PCB for the LEDs, specifically for the main LED emitter and the
red LED.
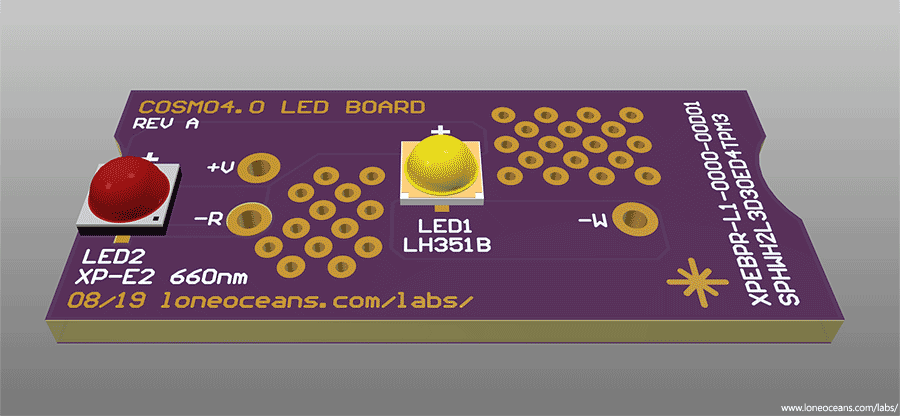
This was done by taking careful measurements of the
original black LED board, and then recreating it in my layout software.
Above shows the result. Care was taken to maximize thermal dissipation
using a generous number of vias and copper pours.
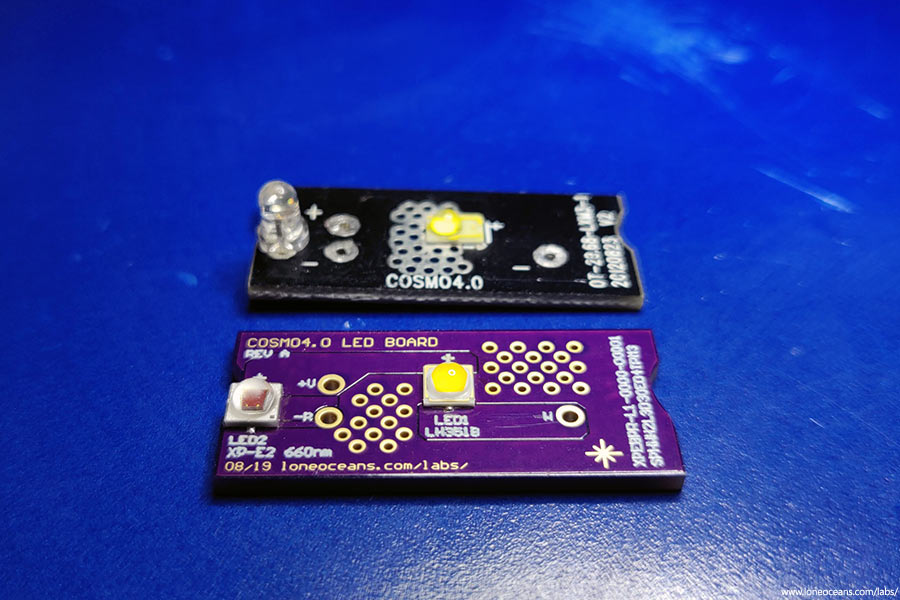
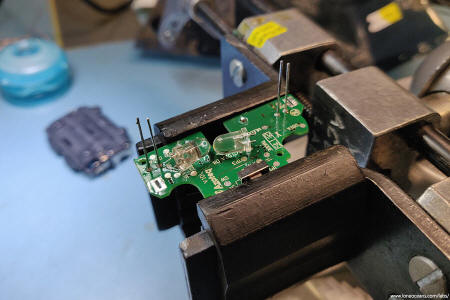
With the design complete, a PCB was ordered and then
soldered up. Fortunately, it all seems to fit!
It's time to put it
together.
Construction
With the new LED board and LEDs in hand,
all that was left to do was to assemble it together.
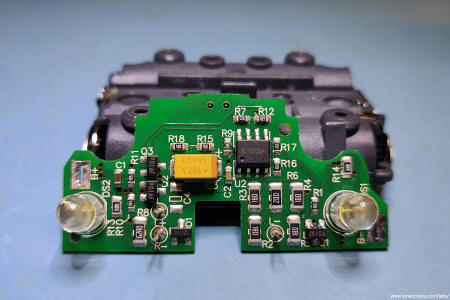
Above - back and front of the main LED driver board.
I had previously desoldered the black LED board from the
main green PCB. Next step was to remove the two though-hole auxiliary
LEDs.
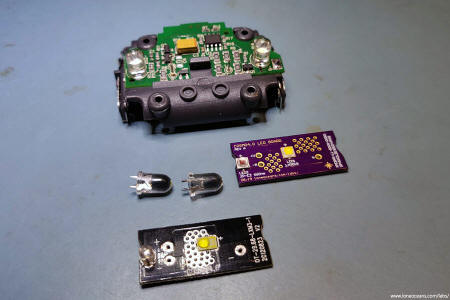
The LEDs were then replaced with the
new Everlight ones, and the
new purple LED board installed.
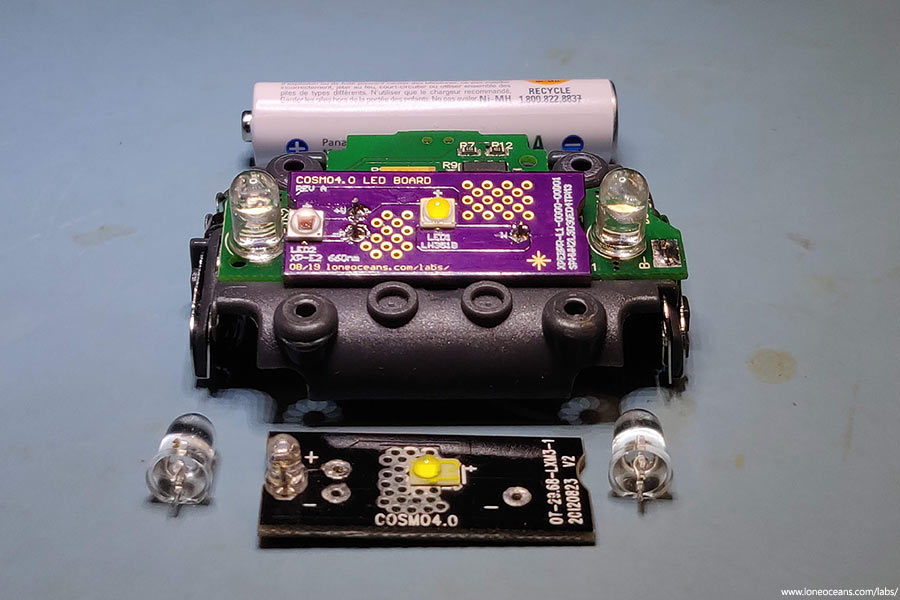
Above, the headlamp upgrade is complete with new
wide-angle warm white auxiliary LEDs, a new Cree 660nm red LED, and the
centre-piece - the Samsung LH351B emitter.
The casing was put back on, and I'm glad to say that
everything fits perfectly!
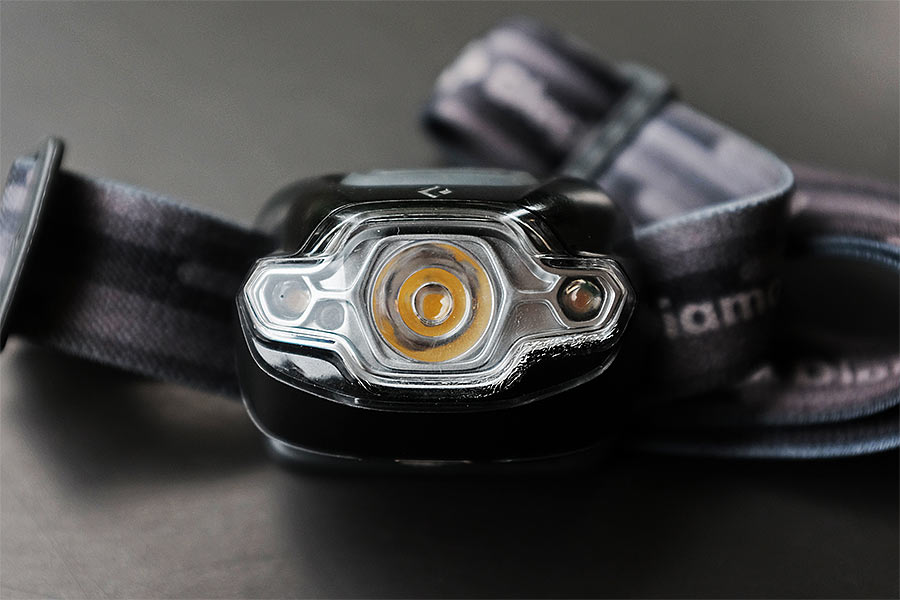
Black Diamond Cosmo 2013 - now upgraded with brand-new internals!
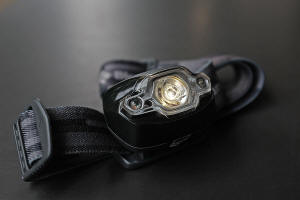

Everything checks out well - main emitter, auxiliary, and red.
Let's take a look at some light output before / after
comparison photos.
Results - Before & After
October 2019
Beam Shot Comparison
I took some photographs of the performance of the
headlamp with my camera set with manual settings (ISO, shutter speed,
colour-temperature, aperture) kept constant between each set. The
position of the camera and flashlight were kept as similar as possible.
Here are the results!
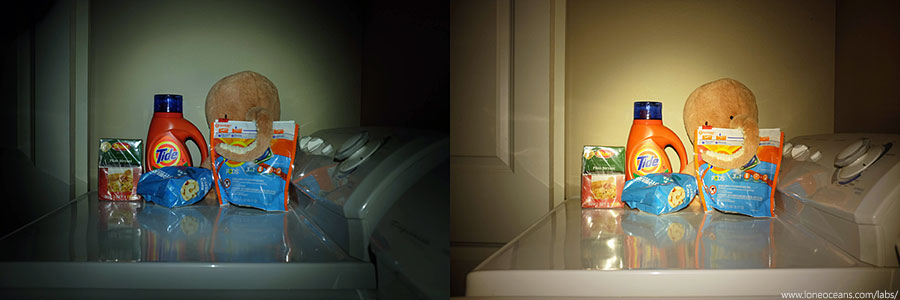
First, a comparison between the original Lumileds LUXEON
Rebel LED at full power, and the new Samsung LH351B. Not only is there a
significant bump in brightness due to the >50% luminous efficacy of
the LH351B,
both colour rendition and colour temperature are significantly improved. The new LED also played very well with the
existing
optics, and I was extremely happy with how this emitter swap turned out.
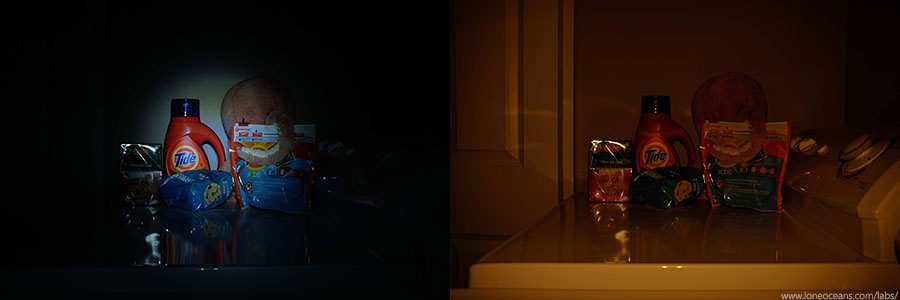
Next, let's take a look at the auxiliary white emitters.
It should be quite clear why I didn't like the original one on the left
- it had an extremely narrow viewing angle, had odd tint shifts, and was
generally not very useful in any situation.
The new 50-degree warm-white
LEDs (right) project a lot more light overall, even if it doesn't
produce as bright a hot-spot. I found this to be much more useful in my
use-case scenarios (for close-up use at night, such as inside a tent).
In fact, this mode was so unusual that a friend commented how he liked
that it produced such a nice warm glow, like a candlelight. Happy with
how this turned out too.
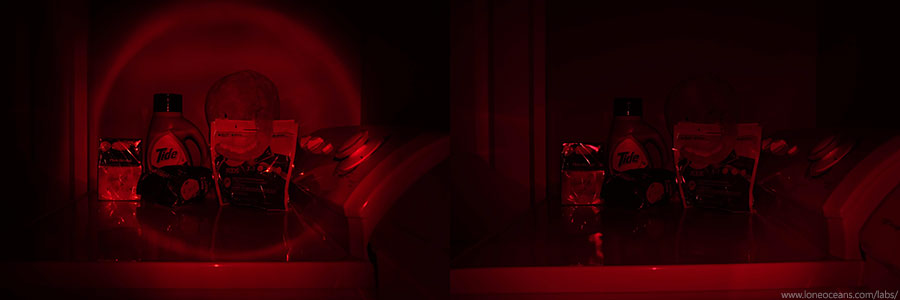
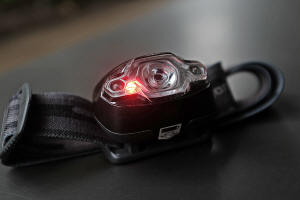
Lastly was the emitter swap from the red T1-5mm red LED
to the Cree 3535 emitter - this turned out to be poorer than I was
hoping for, likely due to the fact that the actual emitter sits much
deeper internally compared to the original 5mm LED. I liked the more
diffuse result, but I would have preferred if it was slightly brighter.
Regardless, it is still very usable for Astronomy sessions!
Overall, I was happy with how the mod turned out. Thanks
for reading!
Back to main page
(c) Gao Guangyan 2025
Contact: loneoceans [at] gmail [dot] com |